This is Dana's absolute favorite Thanksgiving dessert…a pumpkin pie alternative. Lighter texture, creamy and just plain delicious. Enjoy!
24 crushed graham crackers
1/3 cup sugar
1/2 cup butter (melted)
2 eggs, beaten
3/4 cup sugar
6 oz. cream cheese (softened)
2 cups pumpkin
3 egg yolks
1/2 cup sugar
1/2 cup milk
1/2 tsp salt
1 tbl cinnamon
1 envelope plain gelatin
3 egg whites
1/4 cup sugar
Whipped topping (9 oz carton)
Preheat oven to 350 degrees
Crush graham crackers and mix with 1/3 cup of sugar and 1/2 cup melted butter. Press into a 9"x13" pan. Mix eggs, 3/4 cup sugar and cream cheese with beater until smooth. Pour over crust. Bake 20 minutes. Let cool.
In a saucepan, cook pumpkin, egg yolks. 1/2 cup sugar, milk, salt, cinnamon until mixture thickens. Dissolve gelatin in 2 tbl cold water. Add to pumpkin mixture. Cool. Beat egg whites and 1/4 cup sugar until stiff and makes peaks. Fold into pumpkin mixture. Pour over cooked baked crust. Top with whipped topping. Chill.
Showing posts with label recipe. Show all posts
Wednesday, November 13, 2013
Wednesday, August 22, 2012
August Giveaway!
Hey all you lunch packing, back-to-school Betties! August's Giveaway is a set of 4 lunch containers that are BPA-Free and easy for little hands to open (giveaway does not include lunchbox)! Gone are the days of lunch baggies! Plus 4 different colored lids make it easy to customize lunches (perhaps one child has a food allergy); no mixing up the lunches and they stack nicely in the fridge. Make them the night before and get up and go the next morning! These fit nicely into a standard lunch box and the kids haven't tossed them yet! Keeps food separated too.
Made of non-toxic, food safe polypropylene (PP).
BPA, PVC & phthalate free. FDA-approved.
TO WIN: FOLLOW our blog and leave a comment below, how do you follow us? Try this.

Made in the USA by a MOM!
- Sturdy
- Kid-Friendly lids-designed for easy open
- Not leakproof. Not for liquids
- Dishwasher, microwave, freezer, and fridge safe
Made of non-toxic, food safe polypropylene (PP).
BPA, PVC & phthalate free. FDA-approved.
TO WIN: FOLLOW our blog and leave a comment below, how do you follow us? Try this.
Follow blogs
Following a blog shows authors and readers of the blog that you're a fan, and you can keep track of the blogs you follow via your Reading List on the Blogger dashboard. Following a blog will also create a subscription to the blog in your Google Reader account.
How do I follow blogs?
There are several ways to follow a blog. One of the easiest ways is to visit a blog that has added the Following widget and click on the "Join this site" button under the "Followers" widget:
After you sign in with your Google Account (or another account if you so choose), you'll then see a popup window with the options to either follow publicly or privately.
Select how you'd like to follow the blog, then click the "Follow this blog" button. If you elected to follow the blog publicly, your profile picture will be displayed on the blog with a link to your Blogger profile or Google+ profile (if you've opted to link your blog to your Google+ profile). When you become a follower of a blog, the blog will also be added to your Reading List on your Blogger dashboard. You can become a follower of any blog or URL (even if the blog doesn't have the Followers widget) by adding the blog to your Reading List on the dashboard.
Drawing will be held Wednesday, August 29-Good Luck!
Saturday, August 4, 2012
Back to School Lunch Ideas
Need a little motivation to get creative and healthy with back to school lunches this fall? We stumbled across this great little site with actual pictures of lunch combos for the kids. HUNDREDS of ideas!
Thank you easylunchboxes.smugmug.com/
The containers pictured above can be purchased here at easylunchboxes.com. A set of 4 runs 13.95
Happy lunch making!
-The Betties
Monday, July 23, 2012
Sweet Tea
A summertime must. Sweetened iced tea. Did you know there is a science to it?
If you are from the south you know what I'm talking about. Filling a glass up with iced tea and adding sugar to it is one way...but dare I say it's not the right way? So today let's talk about the proper way; southern style.
Aunt B's Sweet Tea
4 quarts of hot water (Aunt B uses Distilled Water to keep the tea clear)
3 family size Lipton tea bags or 7 regular size tea bags
Let tea bags sit in hot water for at least 30 minutes
Throw out tea bags and add 1 cup of sugar while it's still hot.
Stir to mix and dissolve sugar
Add 2 quarts of cold distilled water into a large serving container
Add sweetened tea
Now add store bought ice until the tea is ice cold
(store bought ice keeps the tea clear and pretty...no cloudiness here!)
This recipe will serve an army of guests depending on the temperature outside and the length of their visit! Cut the recipe in half if your aren't expecting anyone and store in the fridge for up to 3 days. Of course the amount of sugar can be limited or not added at all if your dietary needs require. If you would like an even sweeter tea, keep adding sugar until it suits your tastebuds while the tea is still hot.
Enjoy!
REPURPOSE
A great way to repurpose and reuse...Dana's Aunt B uses a large container that pretzels or candy come packaged in from Costco or Sam's Club. Find a fancy lid from an existing pot or pan, add a ladle and viola!! A beautiful way to serve iced tea (make sure the opening is large enough to fit the ladle)! Make sure your tea is cool and not hot before pouring it in. These plastic containers are not meant for hot liquids. It's lightweight and won't break!
Plus no drippy nozzle at the bottom to contend with.
-The Betties
Tuesday, July 17, 2012
Cucumber and Onion Salad
On a recent trip to Perini's Steakhouse in Buffalo Gap Texas (population 499); home of real cowboy cooking, Dana came across this great summertime salad. These cucumbers are tangy and sweet; treated almost as a condiment... like relish. Alongside a green salad it makes the perfect accompaniment with the main dish. And if you ever find yourself in Buffalo Gap...stop by the restaurant. You will not be disappointed! Enjoy!
Cucumber and Onion Salad
2 pounds slender cucumbers with skins, sliced 1/4 inch thick
1 large Texas sweet onion, thinly sliced
2 cups vinegar
1/2 cup sugar
2 teaspoons of salt
2 cups ice cubes
Parsley and cilantro, to taste (optional)
Combine the vinegar, sugar, and salt, and add ice cubes. Stir in herbs. Toss cucumbers and onions in dressing and refrigerate. Let sit in refrigerator at least 30 minutes before serving time. Serves 8-10
Perini Steakhouse Cookbook at Amazon
2 teaspoons of salt
2 cups ice cubes
Parsley and cilantro, to taste (optional)
Combine the vinegar, sugar, and salt, and add ice cubes. Stir in herbs. Toss cucumbers and onions in dressing and refrigerate. Let sit in refrigerator at least 30 minutes before serving time. Serves 8-10
Perini Steakhouse Cookbook at Amazon
Friday, May 25, 2012
Peach Cobbler
Continuing our Peach theme this week...Peach Cobbler A la Mode!
One Betty has deep roots in the great state of Texas and is always trying to make the perfect cobbler...trying to compete with some of the finest in the Lone Star State.
If you have been to Texas ya'll know what she's talkin' about...they do not mess around down there when it comes to BBQ, Cobbler and Sweet Tea.
When she married the Phoenix native also known as the Cute Banker...he had no idea what cobbler was. To this day he says, "It looks like a pie that somebody dropped."
Well, she's given up trying to force her love of fruity filled crust down his throat. He just doesn't get it.
Instead, she focuses on passing the down-home cooking methods to her 4 boys. They are growing like weeds, always hungry and would eat a pie that someone dropped.
Thankfully the kids gobble this stuff up leaving this Betty to savor only a bite or two...swimsuit season is here...and cobbler thighs...no thanks.
So here is our version of Texas Peach Cobbler from two Arizona gals:)
1/2 cup crisco
1/2 cup cold butter
2-1/4 cups flour
Cold Water
1-1/4 cups sugar
1 pinch salt
3 Tablespoons flour
2 frozen (16 oz) bags peaches or 4 cups fresh peaches peeled and sliced
1 cup water
1/4 cup butter
Combine crisco and 1/2 cup of cold butter in a bowl with 2-1/4 cups of flour.
Using a pastry cutter work the dough until crumbly and course.
Add about two Tablespoons of cold water or just enough that the dough sticks together.
Once you have a nice round ball, turn it onto a floured surface and roll thin.
(The secret to good pie crust is not overworking the dough and using COLD ingredients)
Cut up remaining 1/4 cup of butter and place in the bottom of a standard 9x13 baking dish.
in a separate bowl combine peaches and water. Add sugar and 3 T of flour. Stir to coat peaches.
Transfer Peaches to baking dish and top with rolled out crust. Sprinkle with a little sugar and bake at 350° for about 50 minutes or until crust is golden.
Serve warm with a scoop of vanilla ice cream.
Enjoy!
“An apple is an excellent thing — until you have tried a peach.”
George du Maurier (1834-1896)
Tuesday, May 22, 2012
Peach Muffins
So this week we are talkin' peaches, as we both have peach trees prime for picking.
These muffins are a great kick start to the morning and a nice treat as the kids celebrate their last week of school!!! Thank you Lord for summer breaks.
Hang in there...summer break is almost here!
-The Betties
Thursday, May 10, 2012
More outdoor spaces ~ All for Pizza!
We love entertaining friends and who doesn't love a good pizza? Stacie's husband (the handy, outdoorsmen) decided to build an outdoor kitchen, complete with a brick pizza oven. He worked months on ths project and did all the work himself! His hard work paid off and now we enjoy having friends and family over for pizza that everyone seems to love! Here are some pictures of the progress of the building and the end result!
The finished look!
While the handyman is good at building things, he is also good at kneading the dough!
He leaves the rolling to me!
Dough recipe
Bread flour- 1 2/3 cup
Yeast- 1 1/2 tsp.
Sea Salt-3/4 tsp.
Extra Virgin Olive Oil- 1 1/2 Tbl.
Honey- 2 tsp.
Water-3/4 cup
Combine and whisk 1/2 cup of bread flour, yeast, honey, and water: allow to rest for 5 minutes. add olive oil and salt, whisk to incorporate. Begin adding the rest of your bread flour about 1/2 cup at a time, until all flour is added. Turn dough ball out onto a well floured surface and knead dough until it becomes smooth and elastic (8- 10 min.). Cover dough with a towel and allow to rest for 15 minutes. Cut dough balls in half and briefly knead each ball into itself, forming two tight balls. Lightly coat dough with olive oil and allow to rest for one hour, roll it out, and make pizza. They can be placed in plastic bags and stored in refrigerator for up to 2 days; or the freezer up to a month.
As you can see we like lots of toppings and feta cheese is one of our favs!
Enjoy!
Wednesday, May 2, 2012
Makin' Pasta!
So what's a Betty to do with 4 dozen farm fresh eggs from the coop sitting in the fridge? Well, last month we featured a pound cake recipe with 5 eggs. We also made deviled eggs for Easter. We have given some away and Stacie's hubby has quite a following at work, as he brings the fresh eggs in to co-workers and he is known as the "egg guy."
Well even after all of that, we have a surplus! We each get between 6-10 eggs a day! So, this month it's homemade pasta, which we used to make 2 huge pans of lasagna. One for the freezer and one for that night's supper. The kids have a great time helping to roll it out and it tastes amazing. We have never claimed to be chef's...in fact cooking to us is more out of necessity. Although with hungry kids in the kitchen mulling around like baby birds let's face it, you HAVE to cook. We are trying to find some joy in it. So entertain us if you will:)
To get started you will need a pasta roller. Nothing expensive here. We picked this one up at Ross for 20 bucks. But rolling the pasta out with a rolling pin was a little harder than expected so having the roller really helps.
Well even after all of that, we have a surplus! We each get between 6-10 eggs a day! So, this month it's homemade pasta, which we used to make 2 huge pans of lasagna. One for the freezer and one for that night's supper. The kids have a great time helping to roll it out and it tastes amazing. We have never claimed to be chef's...in fact cooking to us is more out of necessity. Although with hungry kids in the kitchen mulling around like baby birds let's face it, you HAVE to cook. We are trying to find some joy in it. So entertain us if you will:)
To get started you will need a pasta roller. Nothing expensive here. We picked this one up at Ross for 20 bucks. But rolling the pasta out with a rolling pin was a little harder than expected so having the roller really helps.
Next step. Eggs and flour. That's it! For 2 servings of pasta you will need 2 eggs and one cup of flour.
Now, in the beginning we bought the expensive semolina flour which is what authentic Italian pasta is made from. Honestly we couldn't tell the difference and preferred the texture of the white flour pasta better, so there you have it.
We put this in the mixer using the bread dough setting which gently kneads the dough instead of mixing it. A friend asked if she could put the ingredients in her bread maker without baking it. We haven't tried it but sounds like a good idea!
You will have a nice round ball when it's completed (about 10 minutes or so).
We take a handful of the dough to run through the roller. A little larger than a golf ball.
Get a large pot of water going on the stove so that it is boiling.
Now we run the dough through the pasta roller TWICE. Most rollers have a dial with different settings on it. We start out rolling it through on the number 6 setting. Once you have rolled it through on that setting change it to a 3 and go again. This lower setting will press the dough thinner but if you start out at this setting it rips the dough apart.
This can be a two person job, so that the dough doesn't stick together.
Our goal is rolling it about a foot long...the length of our large pyrex casserole dish.
Boil the pasta for about 5 minutes. We drizzle and toss the noodles with olive oil so that they don't stick together. Lay flat on a cutting board while you assemble your lasagna ingredients. You will need about 8 large noodles to assemble a full pan. Also, approximately 5 cups of sauce is needed to assemble the lasagna.
Now, our recipe varies depending on spices on hand. So use your favorite sauce recipe. We love adding italian sausage to the ground beef, tomato sauce, fresh basil and garlic. Follow any old recipe for lasagna. The focus here is on the noodles!
The kids and husbands gobbled it down, so it gets an unofficial stamp of approval because it's gone:)
Oh wait, there is an extra one in the freezer! That will come in handy next week after a late night practice at the baseball field or dance studio.
The eggs are down to three dozen in the fridge...we should get our cholesterol checked sometime.
Ciao!
Friday, April 6, 2012
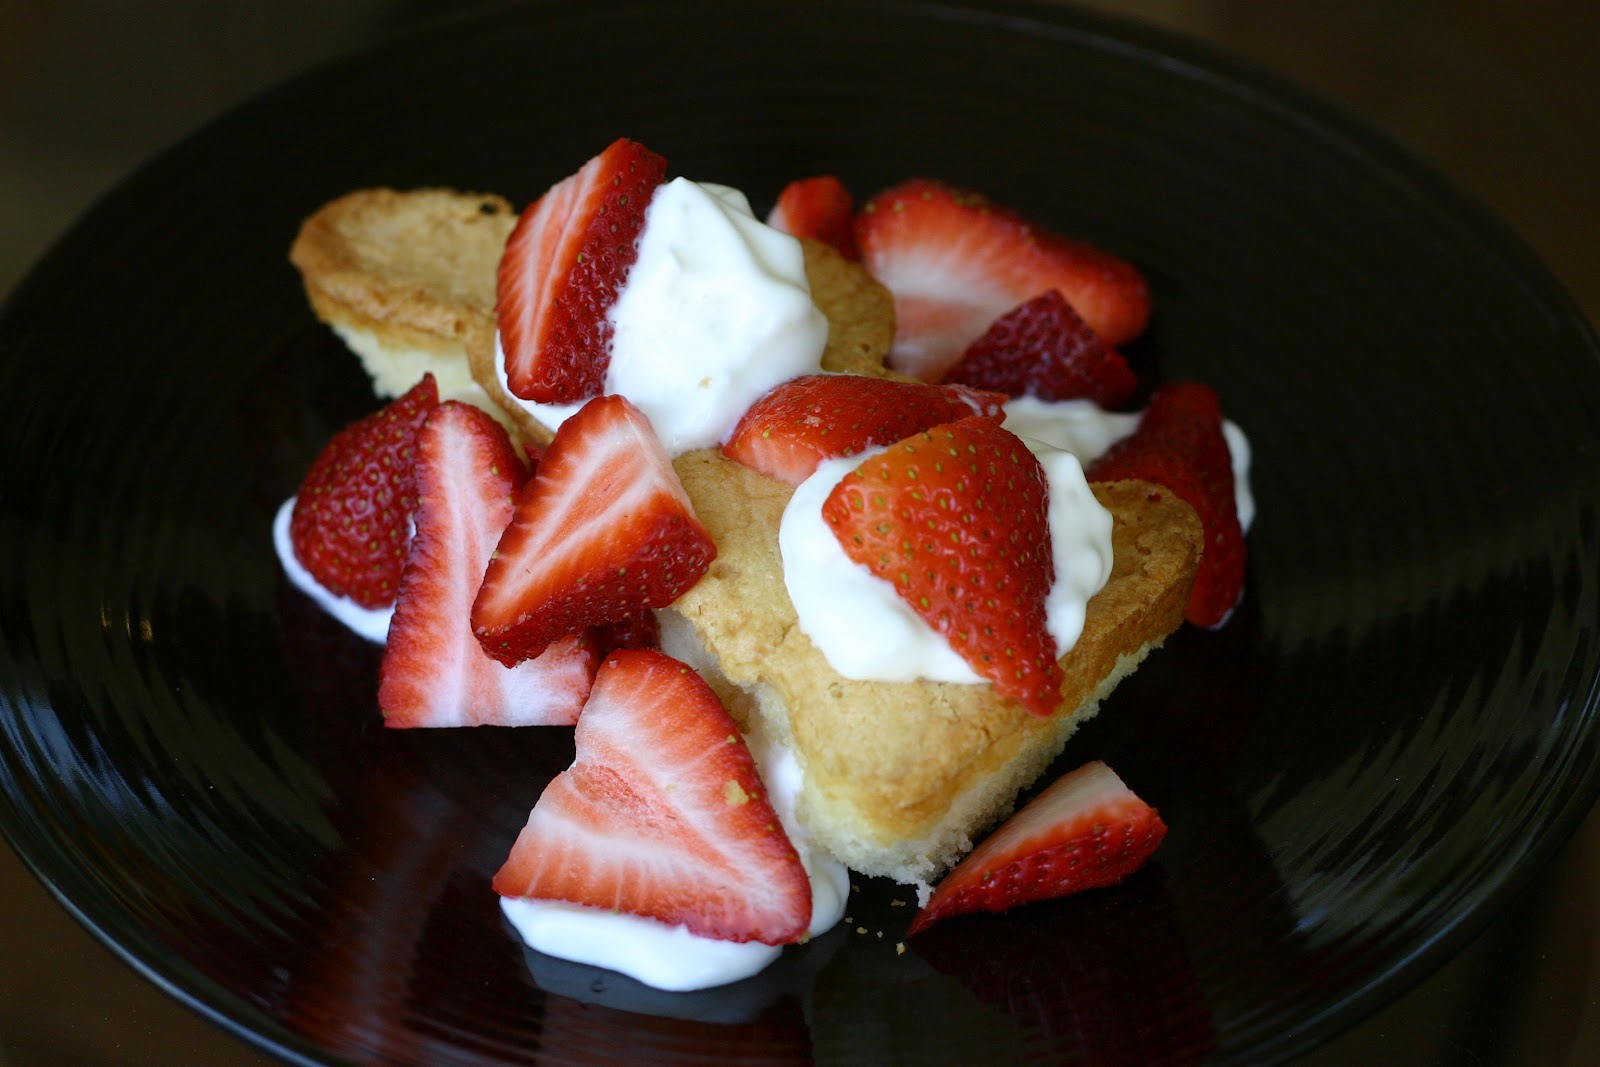
Easter Bunny Strawberry Shortcake.
We are all getting ready for Easter around the acres. Both Stacie and Dana have chickens and plenty of farm fresh eggs. The hens seems to be in overdrive this time of year, producing way more eggs than we can use. We give extras to neighbors, friends and family, but most of the time baking or making our own pasta can really use them up. Here is a recipe for a pound cake that uses 5 eggs! Bingo, just what the Betties need. It's really moist and not too heavy. This year try putting some of the batter into these cute little molds for Easter (found at Fresh and Easy).
Here is the recipe:
This time around I did not use lemon extract and just added more vanilla extract.
I thought it might compliment the
strawberries more.
And for those of you who need a good laugh...this gal is hilarious.
Jeanne Robertson recalls sending her husband "Right Brain" to the store
for these ingredients! Love her accent...
Happy Easter!
Enjoy your time with family and friends.
-The Betties
Subscribe to:
Posts (Atom)